When you head to a trade show, conference, or event you need to represent your organization well with effective, beautifully designed material for your trade show booth. Ideas can be hard to come by and when you’re down to the wire and creating things last minute, commissioning bespoke materials that you’ll only use once may not make sense financially or logistically. But try not to panic! Did you know that you can create lots of different types of materials in PowerPoint? With the benefit of being able to edit on the go and not needing extra software, these trade show booth ideas could be your way to a successful event, whether you’re planning months ahead or scrambling slides together in an airport hotel room!
At BrightCarbon, we’ve made our fair share of videos, interactive documents, presentations, posters, and more for conferences. So, if you’re planning to go it alone, here are a few trade show booth ideas and tips from the experts!
Interactive displays
A navigable resource can be an great addition to any booth. Load it onto a couple of screens or tablets and, when you’re busy, visitors can self-serve and explore your offerings alone. You can also use it to support your own conversations with prospects.
You can create interactive documents in PowerPoint by saving your file as a PowerPoint Show. The benefit of a PowerPoint show over a hyperlinked PDF is that it can be much more dynamic as you can include animations, GIFS, pop ups, video and more.
Though we’re focusing on PowerPoint today, Google Slides does have interactivity options so head to this blog post to learn more about interactive presentations in Google Slides.
How to make an interactive display in PowerPoint
Plan
The first step is to plan the piece. Think of it as a sales presentation, not a catalogue. Instead of presenting attendees with a huge list of all your products and their features, spend some time crafting a persuasive story showing off the benefits of your offering. You should be able to leverage existing sales and marketing collateral to help you – but customize it to the audience you’re likely to encounter at this specific event.
Wireframe
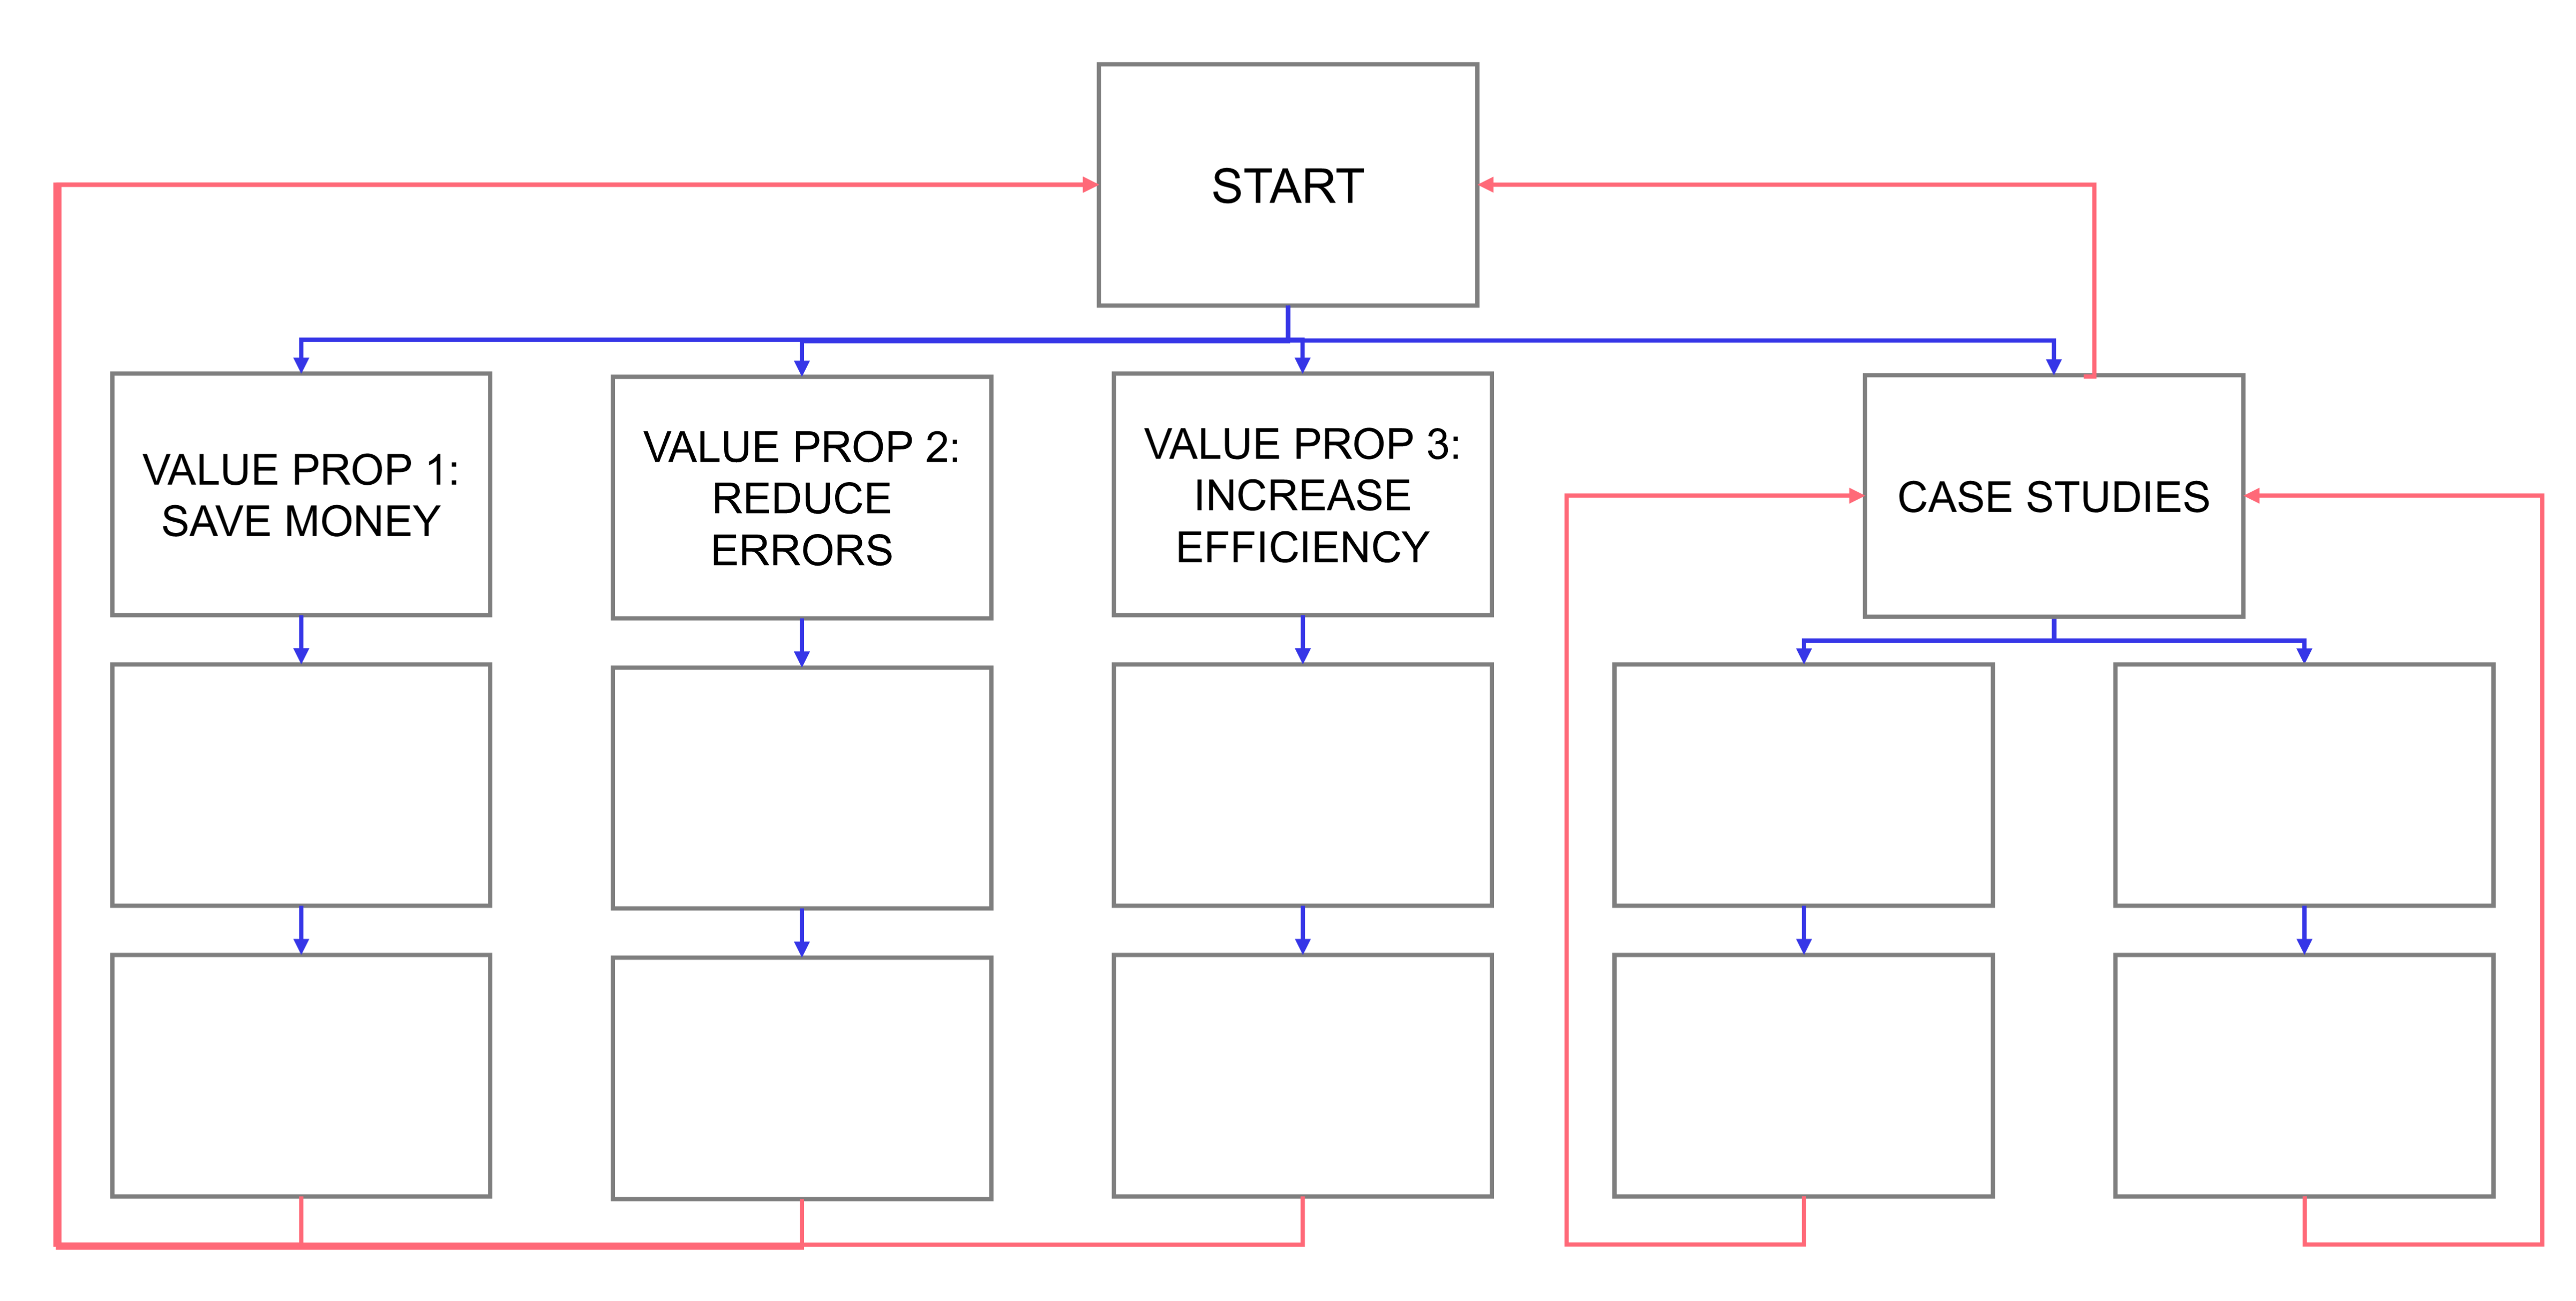
Once you’ve got your story sorted, the next thing to do is create a wireframe. This is a simple map that outlines the different sections of the piece and how the navigation and interactivity will work. If you’ve got this map sorted, it will be much easier to link up the slides correctly later on.
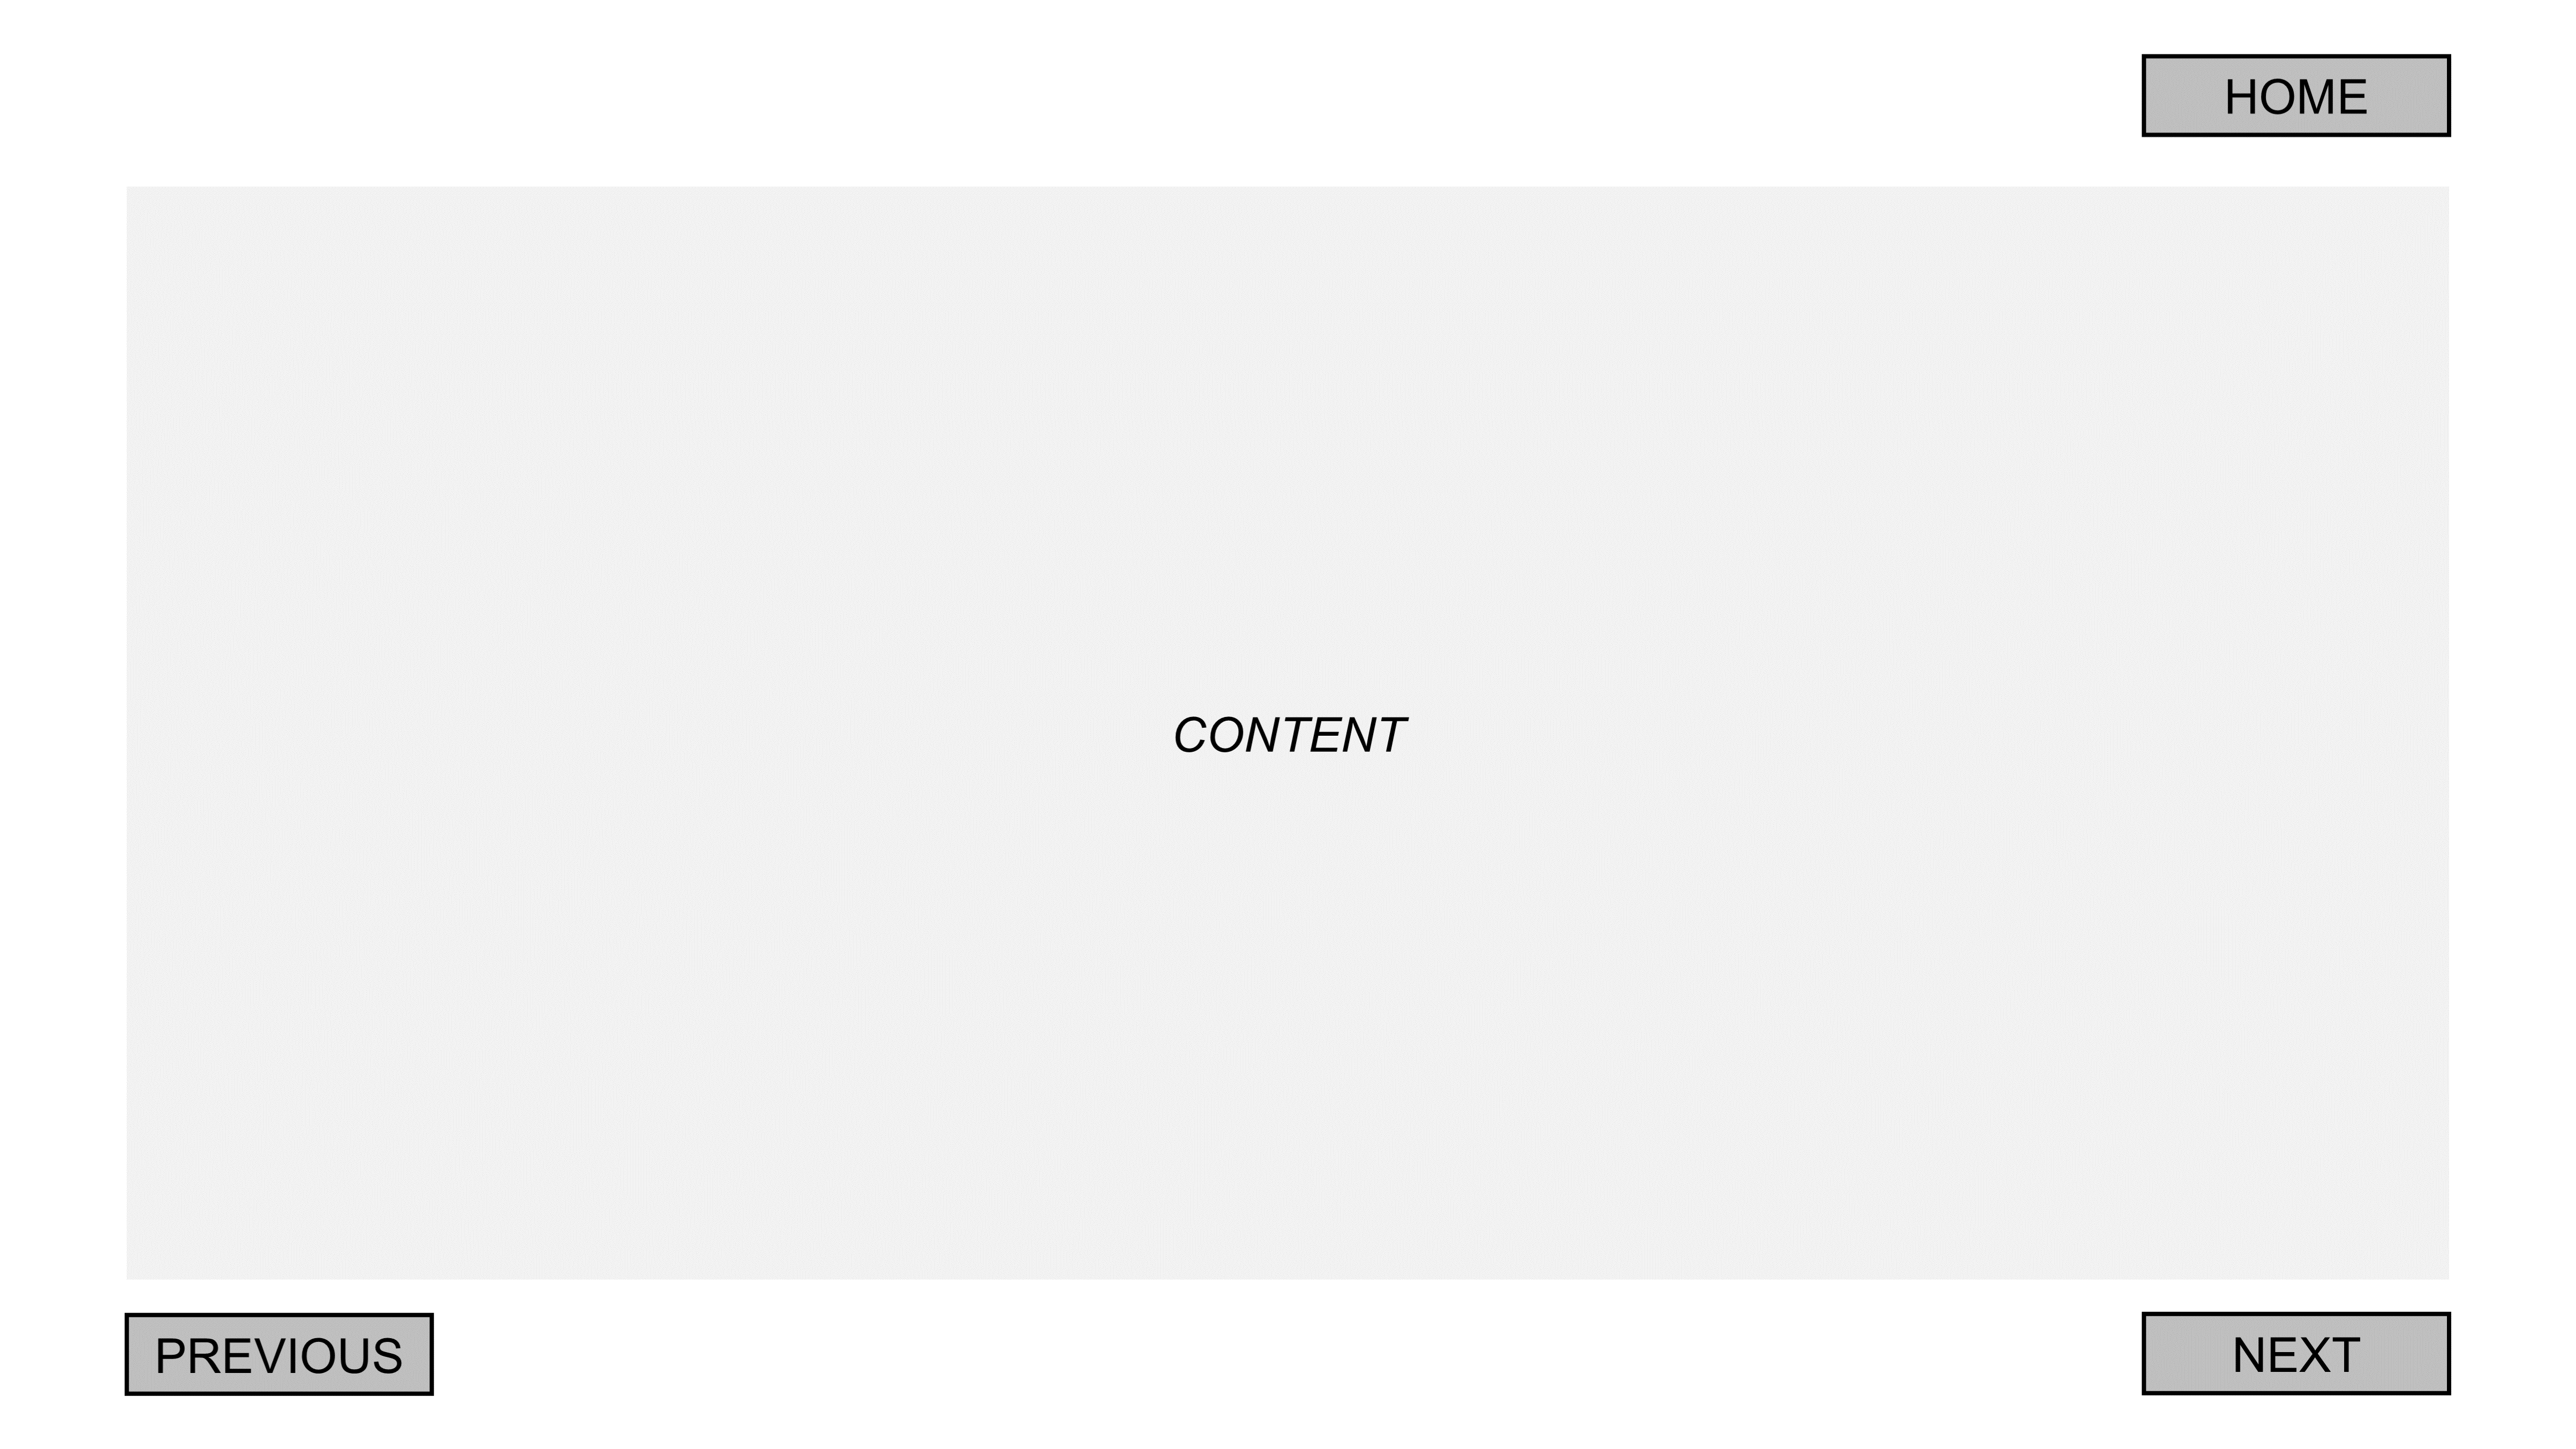
Next, create a navigation wireframe for your slides. This sounds more complex than it is. You simply need to decide how your users will get around the content. Will there be a menu? Where will the different buttons be on the screen? You want to keep the placement as well as the design of buttons consistent throughout to make it easy for users to understand what to do. Tip – Include a ‘restart’ or ‘home’ button to take the user back to the first page.
Develop your content
Now you can set up your PowerPoint and get started with the slides. Make sure to check what screen size you’ll be using – some tablets aren’t the standard 16 by 9. You can easily change the size of slides in PowerPoint to fit any display. Head to the Design tab then the Slide Size drop down and select Custom Slide Size… to enter your own dimensions. You can find more info and detailed instructions on how to change slide size in PowerPoint here.
Another important consideration in the development stage is accessibility. As your audience may be viewing this collateral alone, it’s really important that it’s as accessible as possible. This means making sure that text is legible, checking colour contrast, adding captions where relevant and more. We’ve got a few posts on improving accessibility in presentations that might help.
The last thing to do before you finish is link up your slides. Do this at the end, so that if you move slides around or add things in as you’re working, you don’t have to redo all your links each time. Link up the buttons by right clicking, selecting Link.., Insert Link, then select a specific slide or set the button to always go to the last or next slide.
If you have linked up Previous/Next buttons you can copy and paste these onto all your slides to save time. You can even use our free add-in BrightSlide to batch paste your navigation buttons to all your slides in just one click.
Save as PowerPoint Show
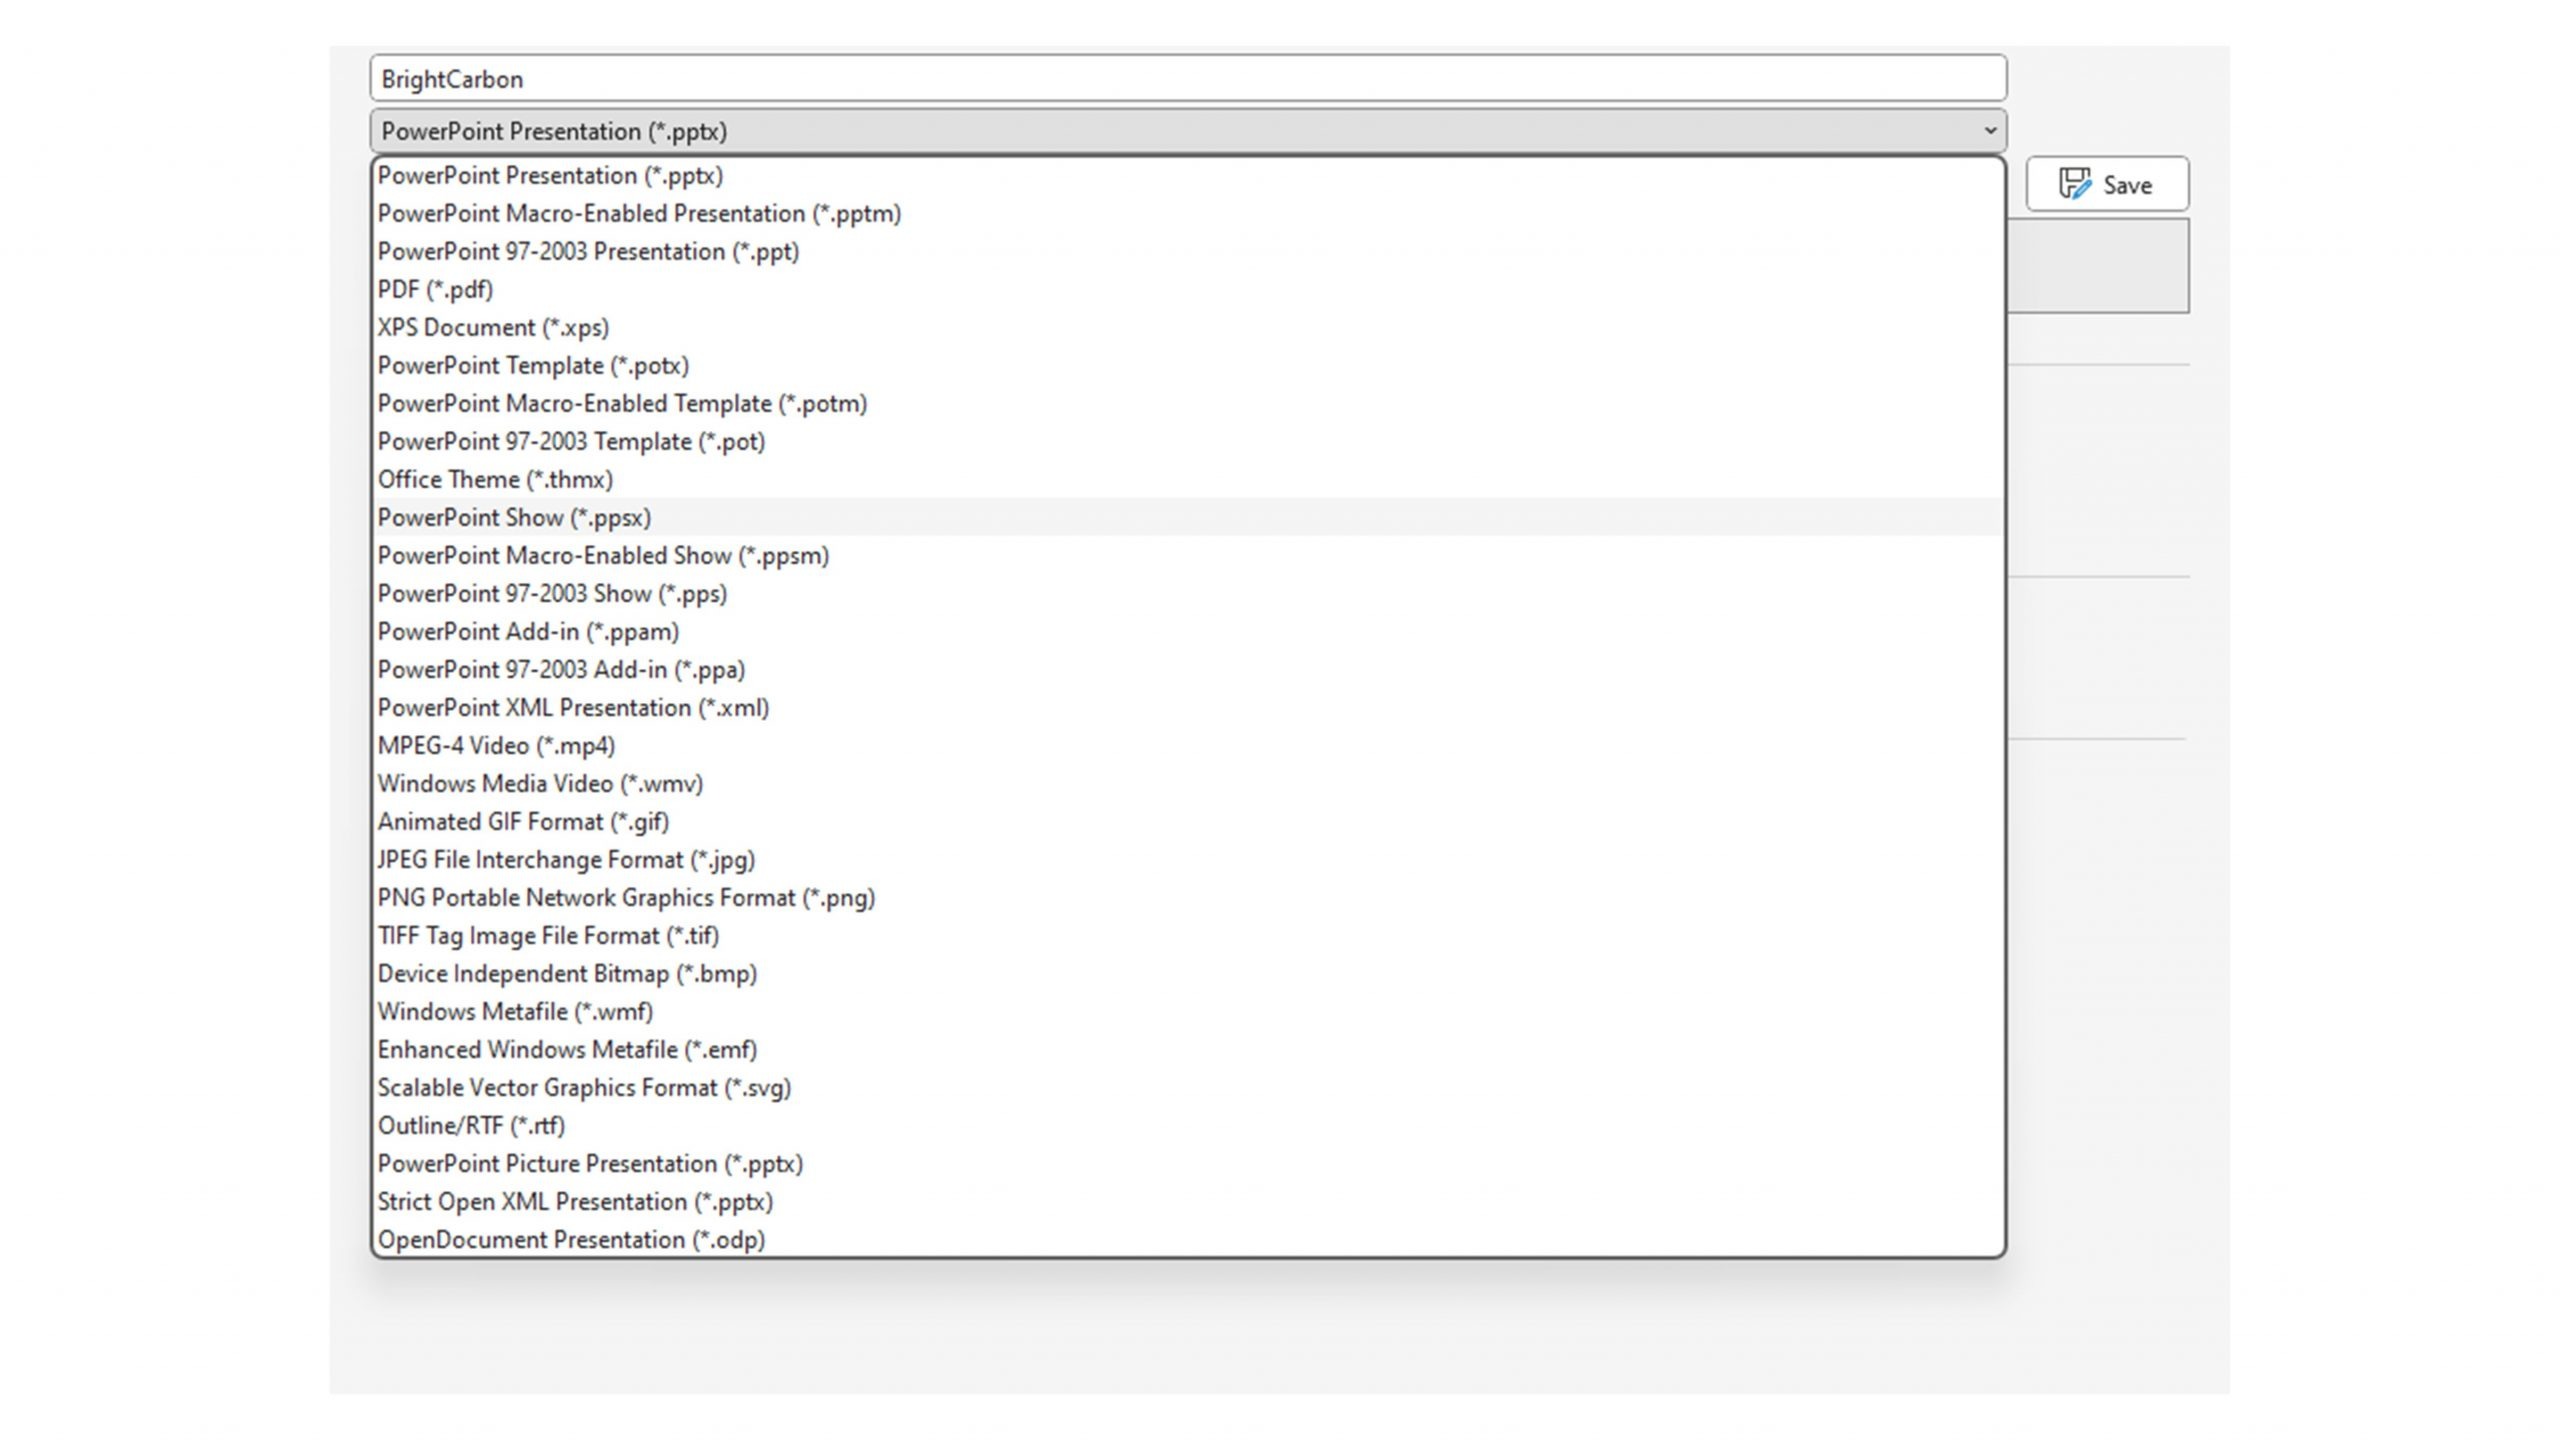
When you’re ready, save the file as a PowerPoint Show (File>Save as>PowerPoint Show).
Test your interactive display
Finally, it’s important to test the piece on the devices you’ll be using on the day to iron out any technical issues. Ask a few colleagues to click through and try to break the document by jumping around to make sure your linking is robust.
Once you’ve conquered a basic interactive PowerPoint, you might be ready to try something a bit more complicated. There’s lots you can do to really customize your interactive displays with VBA. For example, you can create hover states like you can see here:
Trade show booth idea number two! If you’ve got a big screen at your disposal then a looping video is a great way to catch the eye of attendees wandering past. Here are a few considerations for what makes a good trade show booth video.
Careful “scripting”
We’d usually be the first to tell you to get rid of the text on your slides and replace them with visuals. Well, do the same thing here, but then add some text back in. This video needs to be self-explanatory, so someone can stop and watch for a minute and then walk on knowing more about your organisation and your offering. However, don’t get too cozy with your content, avoid paragraphs of text as they will be overwhelming and dull to look at. Before you put anything onto a slide, map out the video and work out what key visuals and short phrases you’re going to use. Try to make sure there’s a nice flow through the video rather than having a bunch of disjointed information haphazardly thrown together. You might find a classic sales structure of problem-solution-benefit works well.
Engaging visuals
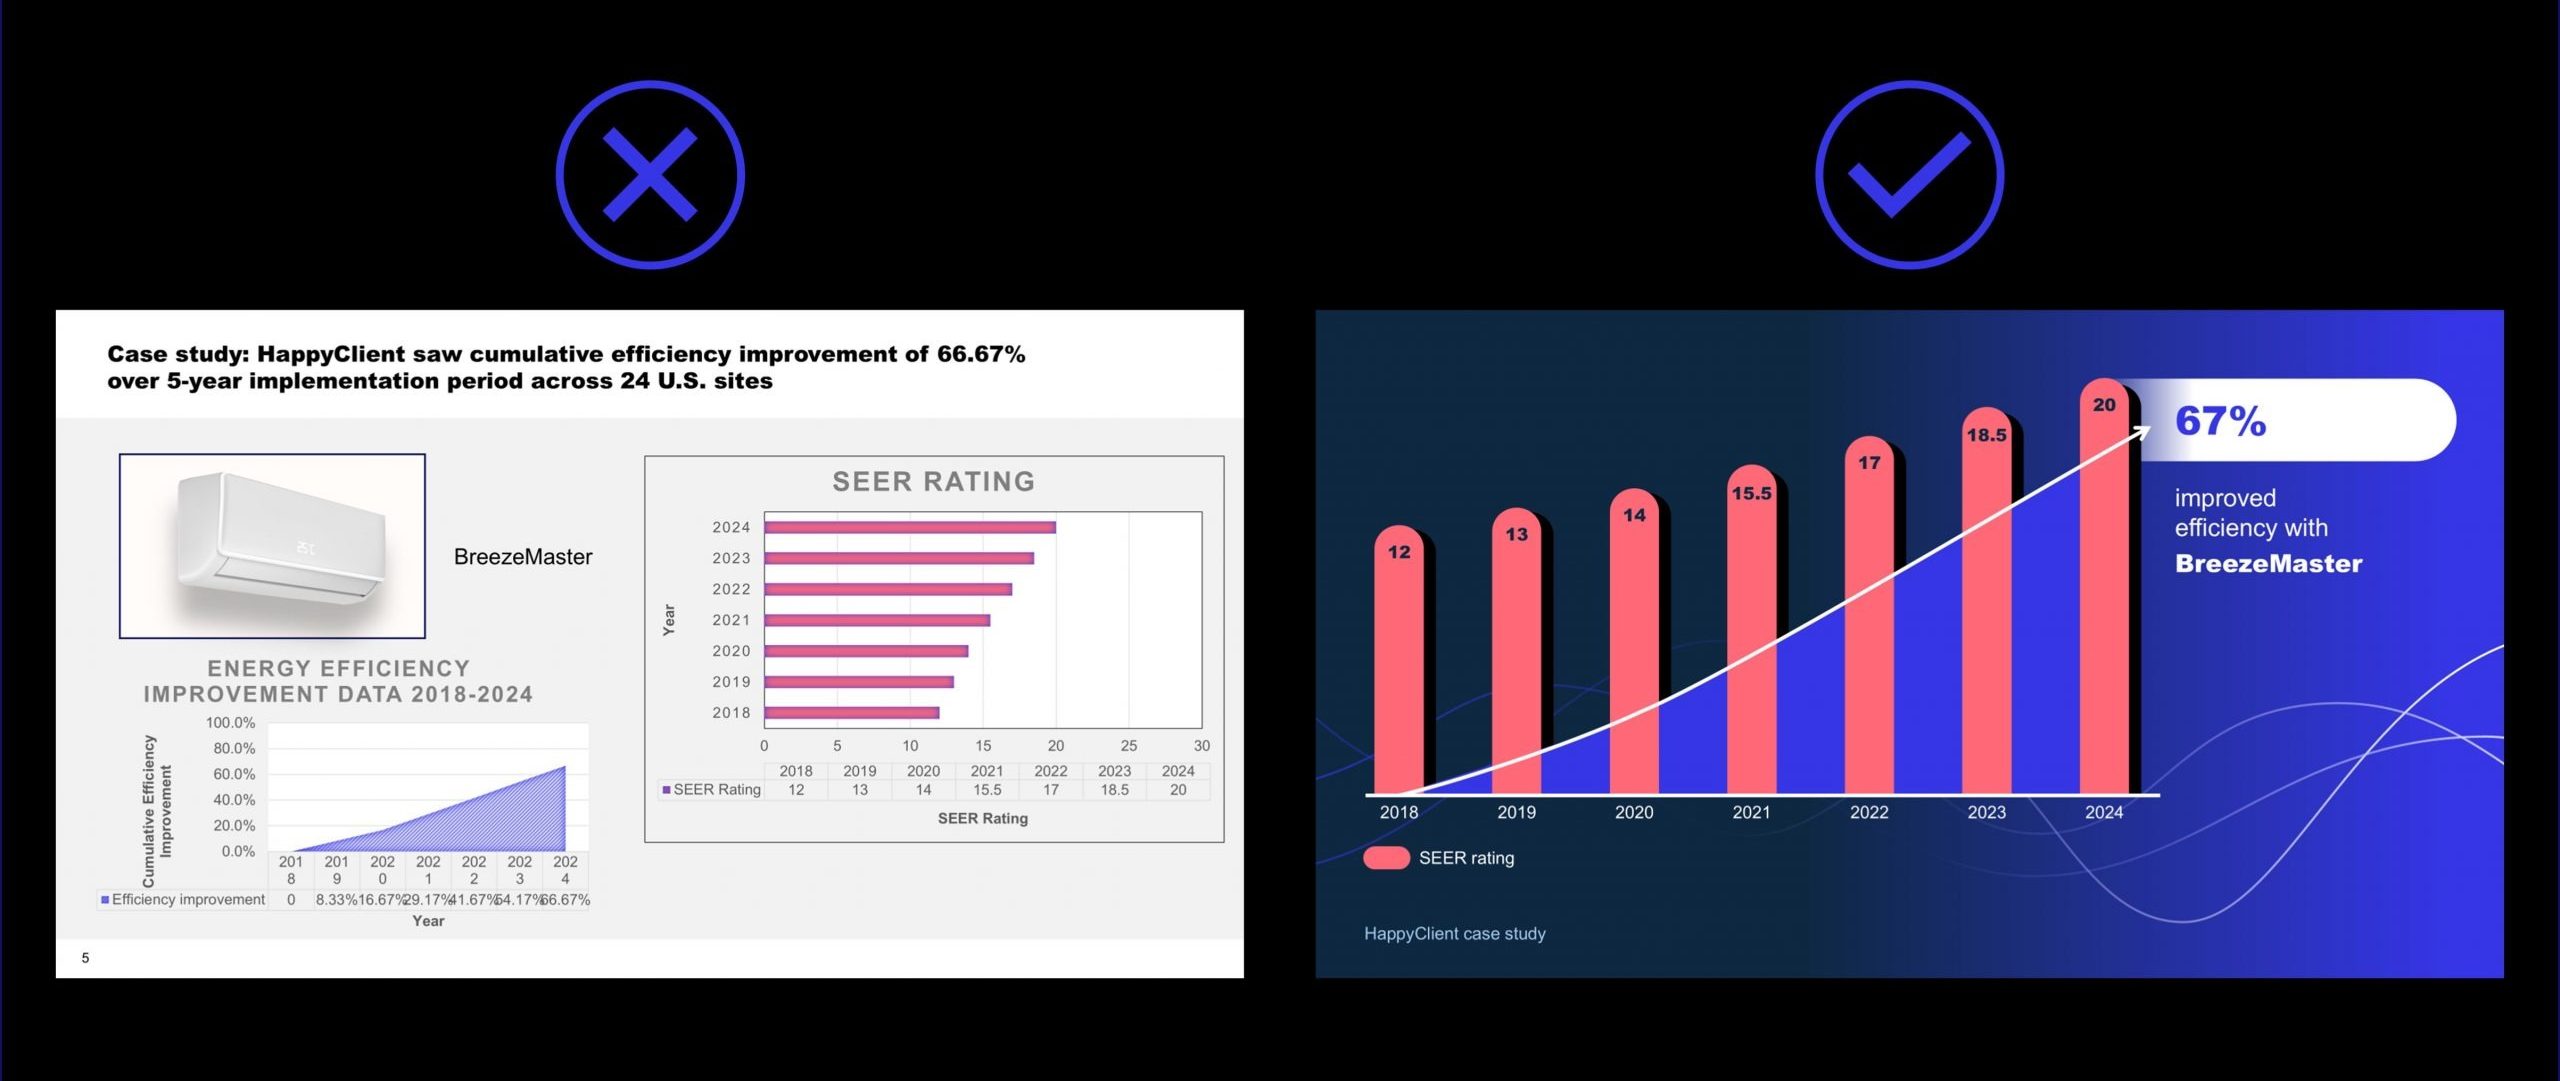
When you’re planning your visuals for a video wall, make sure you’re not leaning too heavily on overly detailed graphs or charts as these might be difficult for your audience to see. You also want to avoid crowded slides, try to make each slide or ‘scene’ in your video have one clear message so anyone glancing at it as they wander past can immediately understand the point. Stick to big, bold visuals that clearly get your message across and add text judiciously to drive your point home.
Purposeful animation
Pace your video carefully so that you leave enough time for people to properly absorb the visuals or read the text. This might mean sticking on each slide longer than you think. Test it by timing yourself reading the on each slide text aloud and give your audience that much time on the slide.
That said, you want to avoid the slide being totally static during this time as you don’t want your video to look boring. There are a few simple animation tricks you can use to have constant (but non-distracting!) movement making your display dynamic at all times. For example, in this trade show booth video we made, we added subtle movement on the images to keep things interesting.
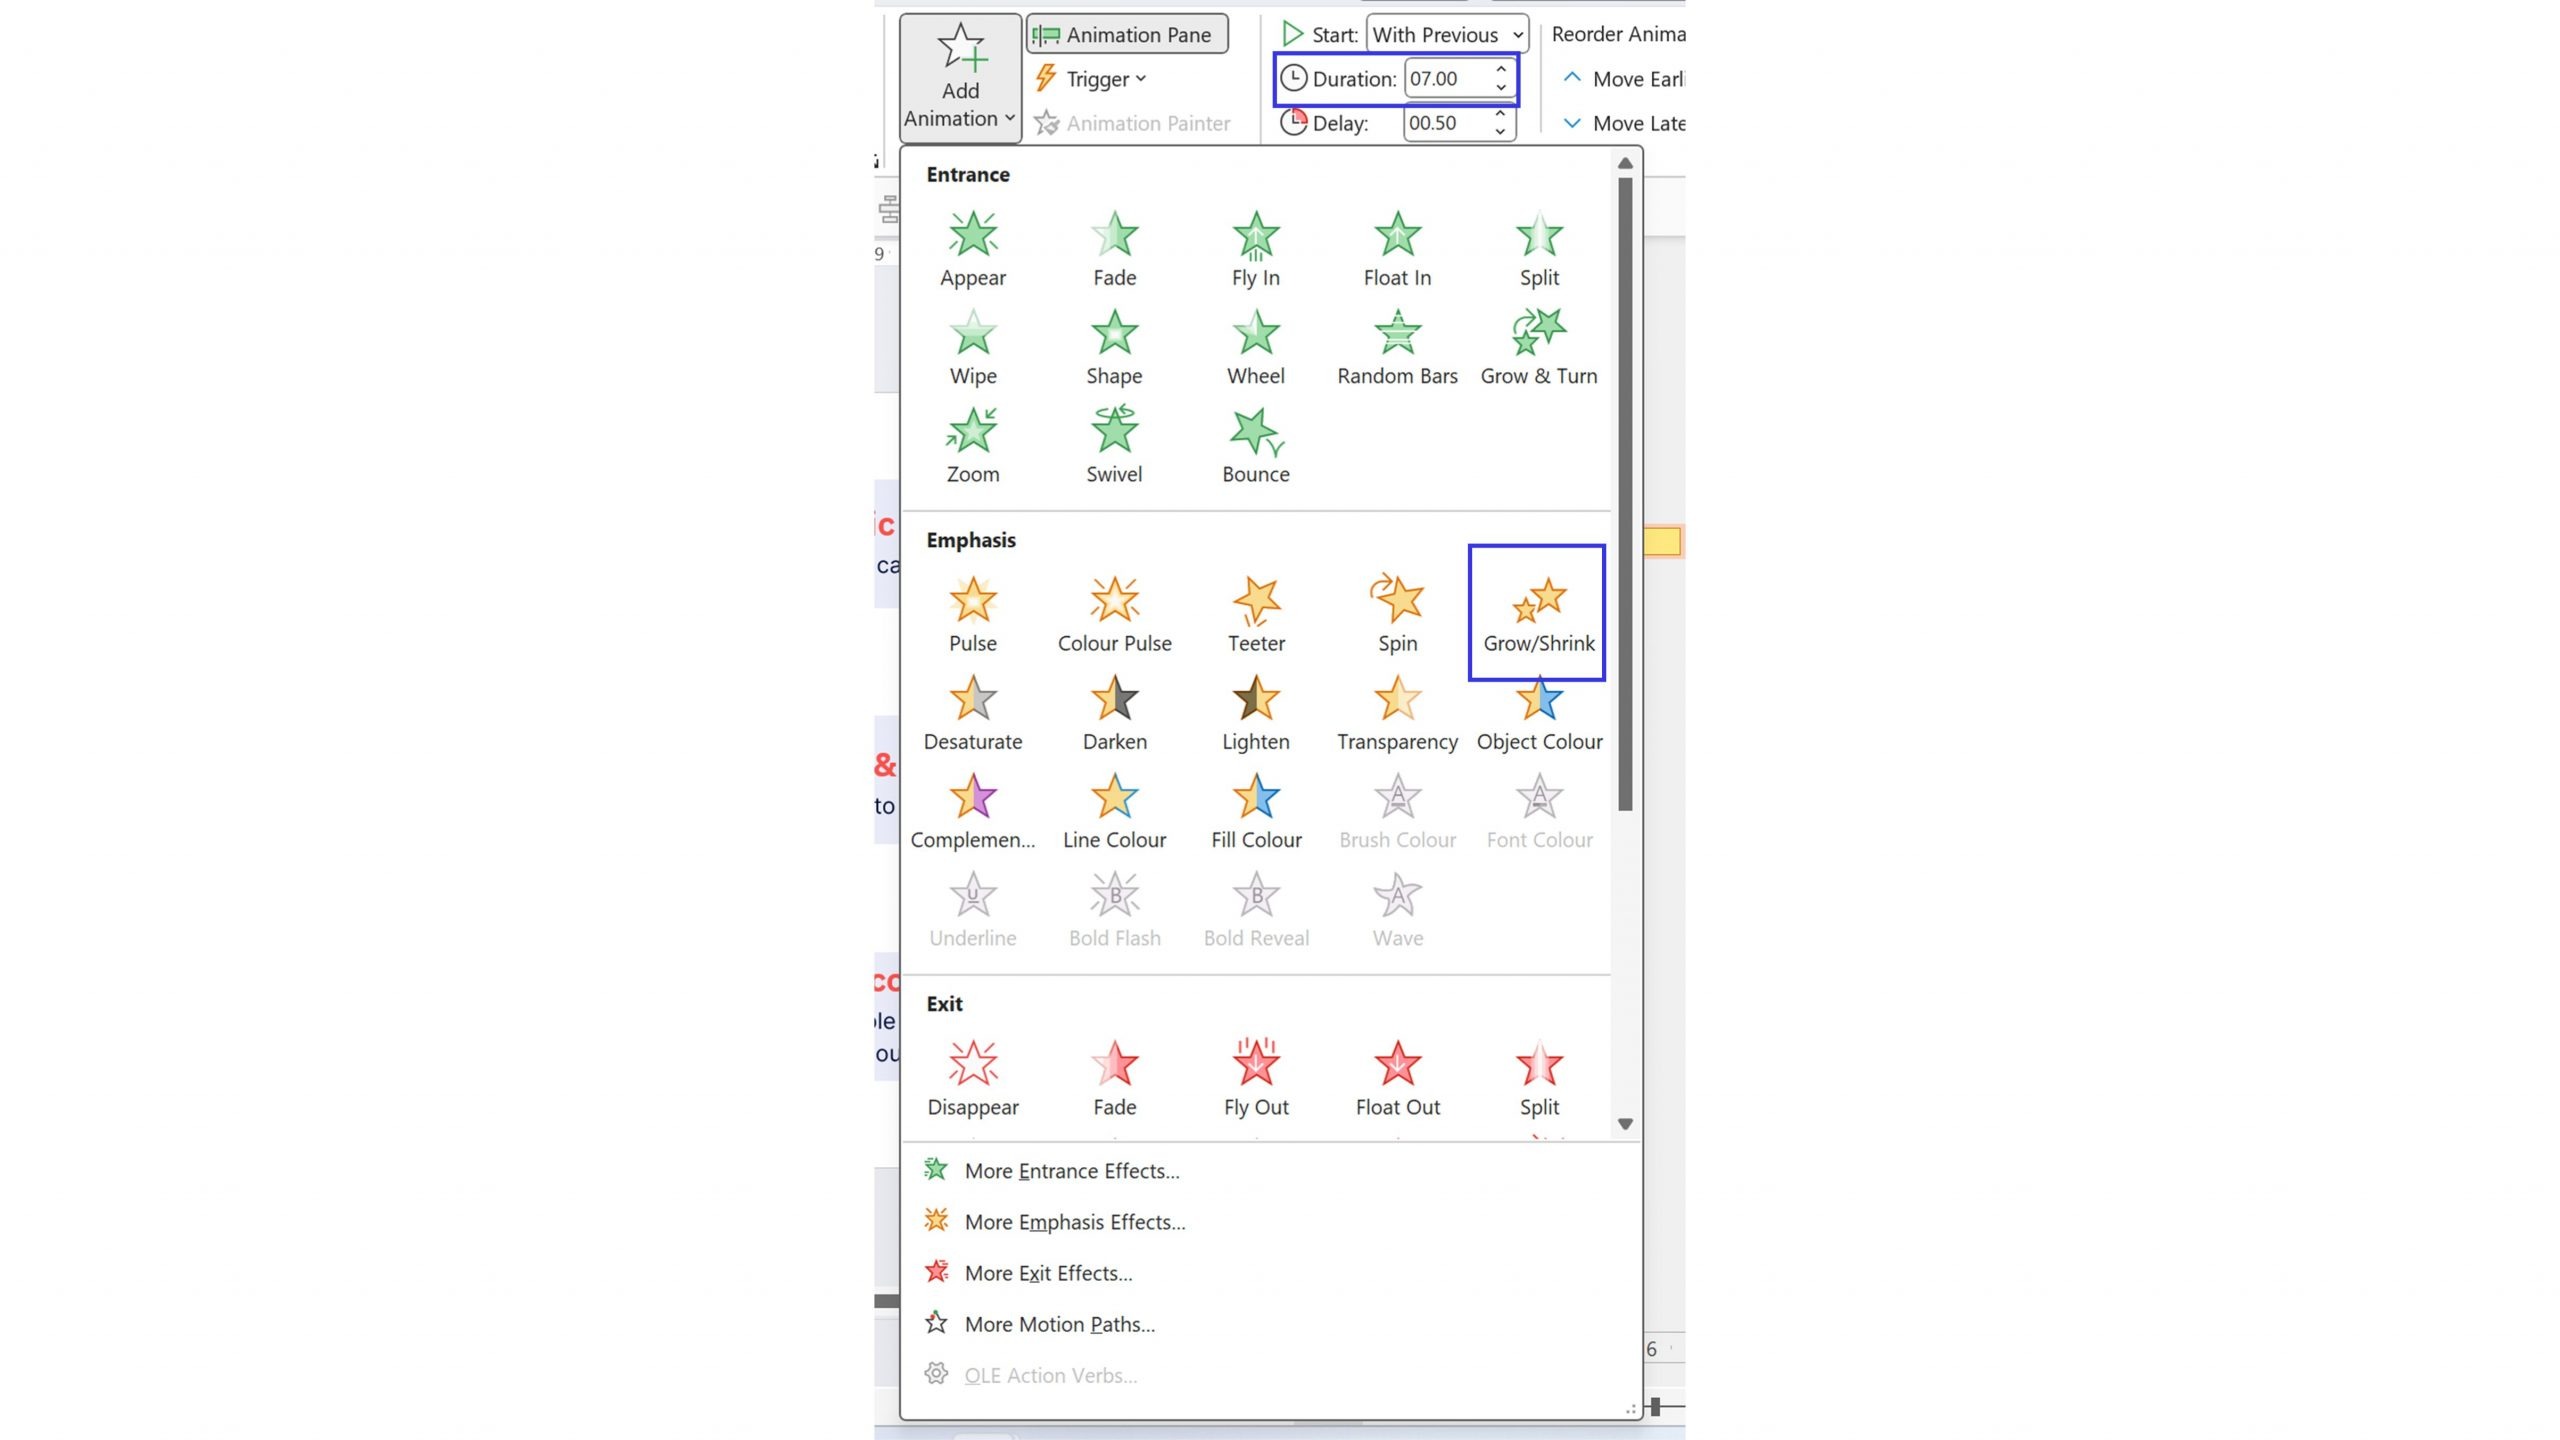
To do this, add a Grow Emphasis animation to your image. This will make the picture bigger. The default is that it will grow 150%, and this can look a bit naff. Adjust the setting to something like 105%. Then extend the animation duration to 5-10 seconds and give it a Smooth end.
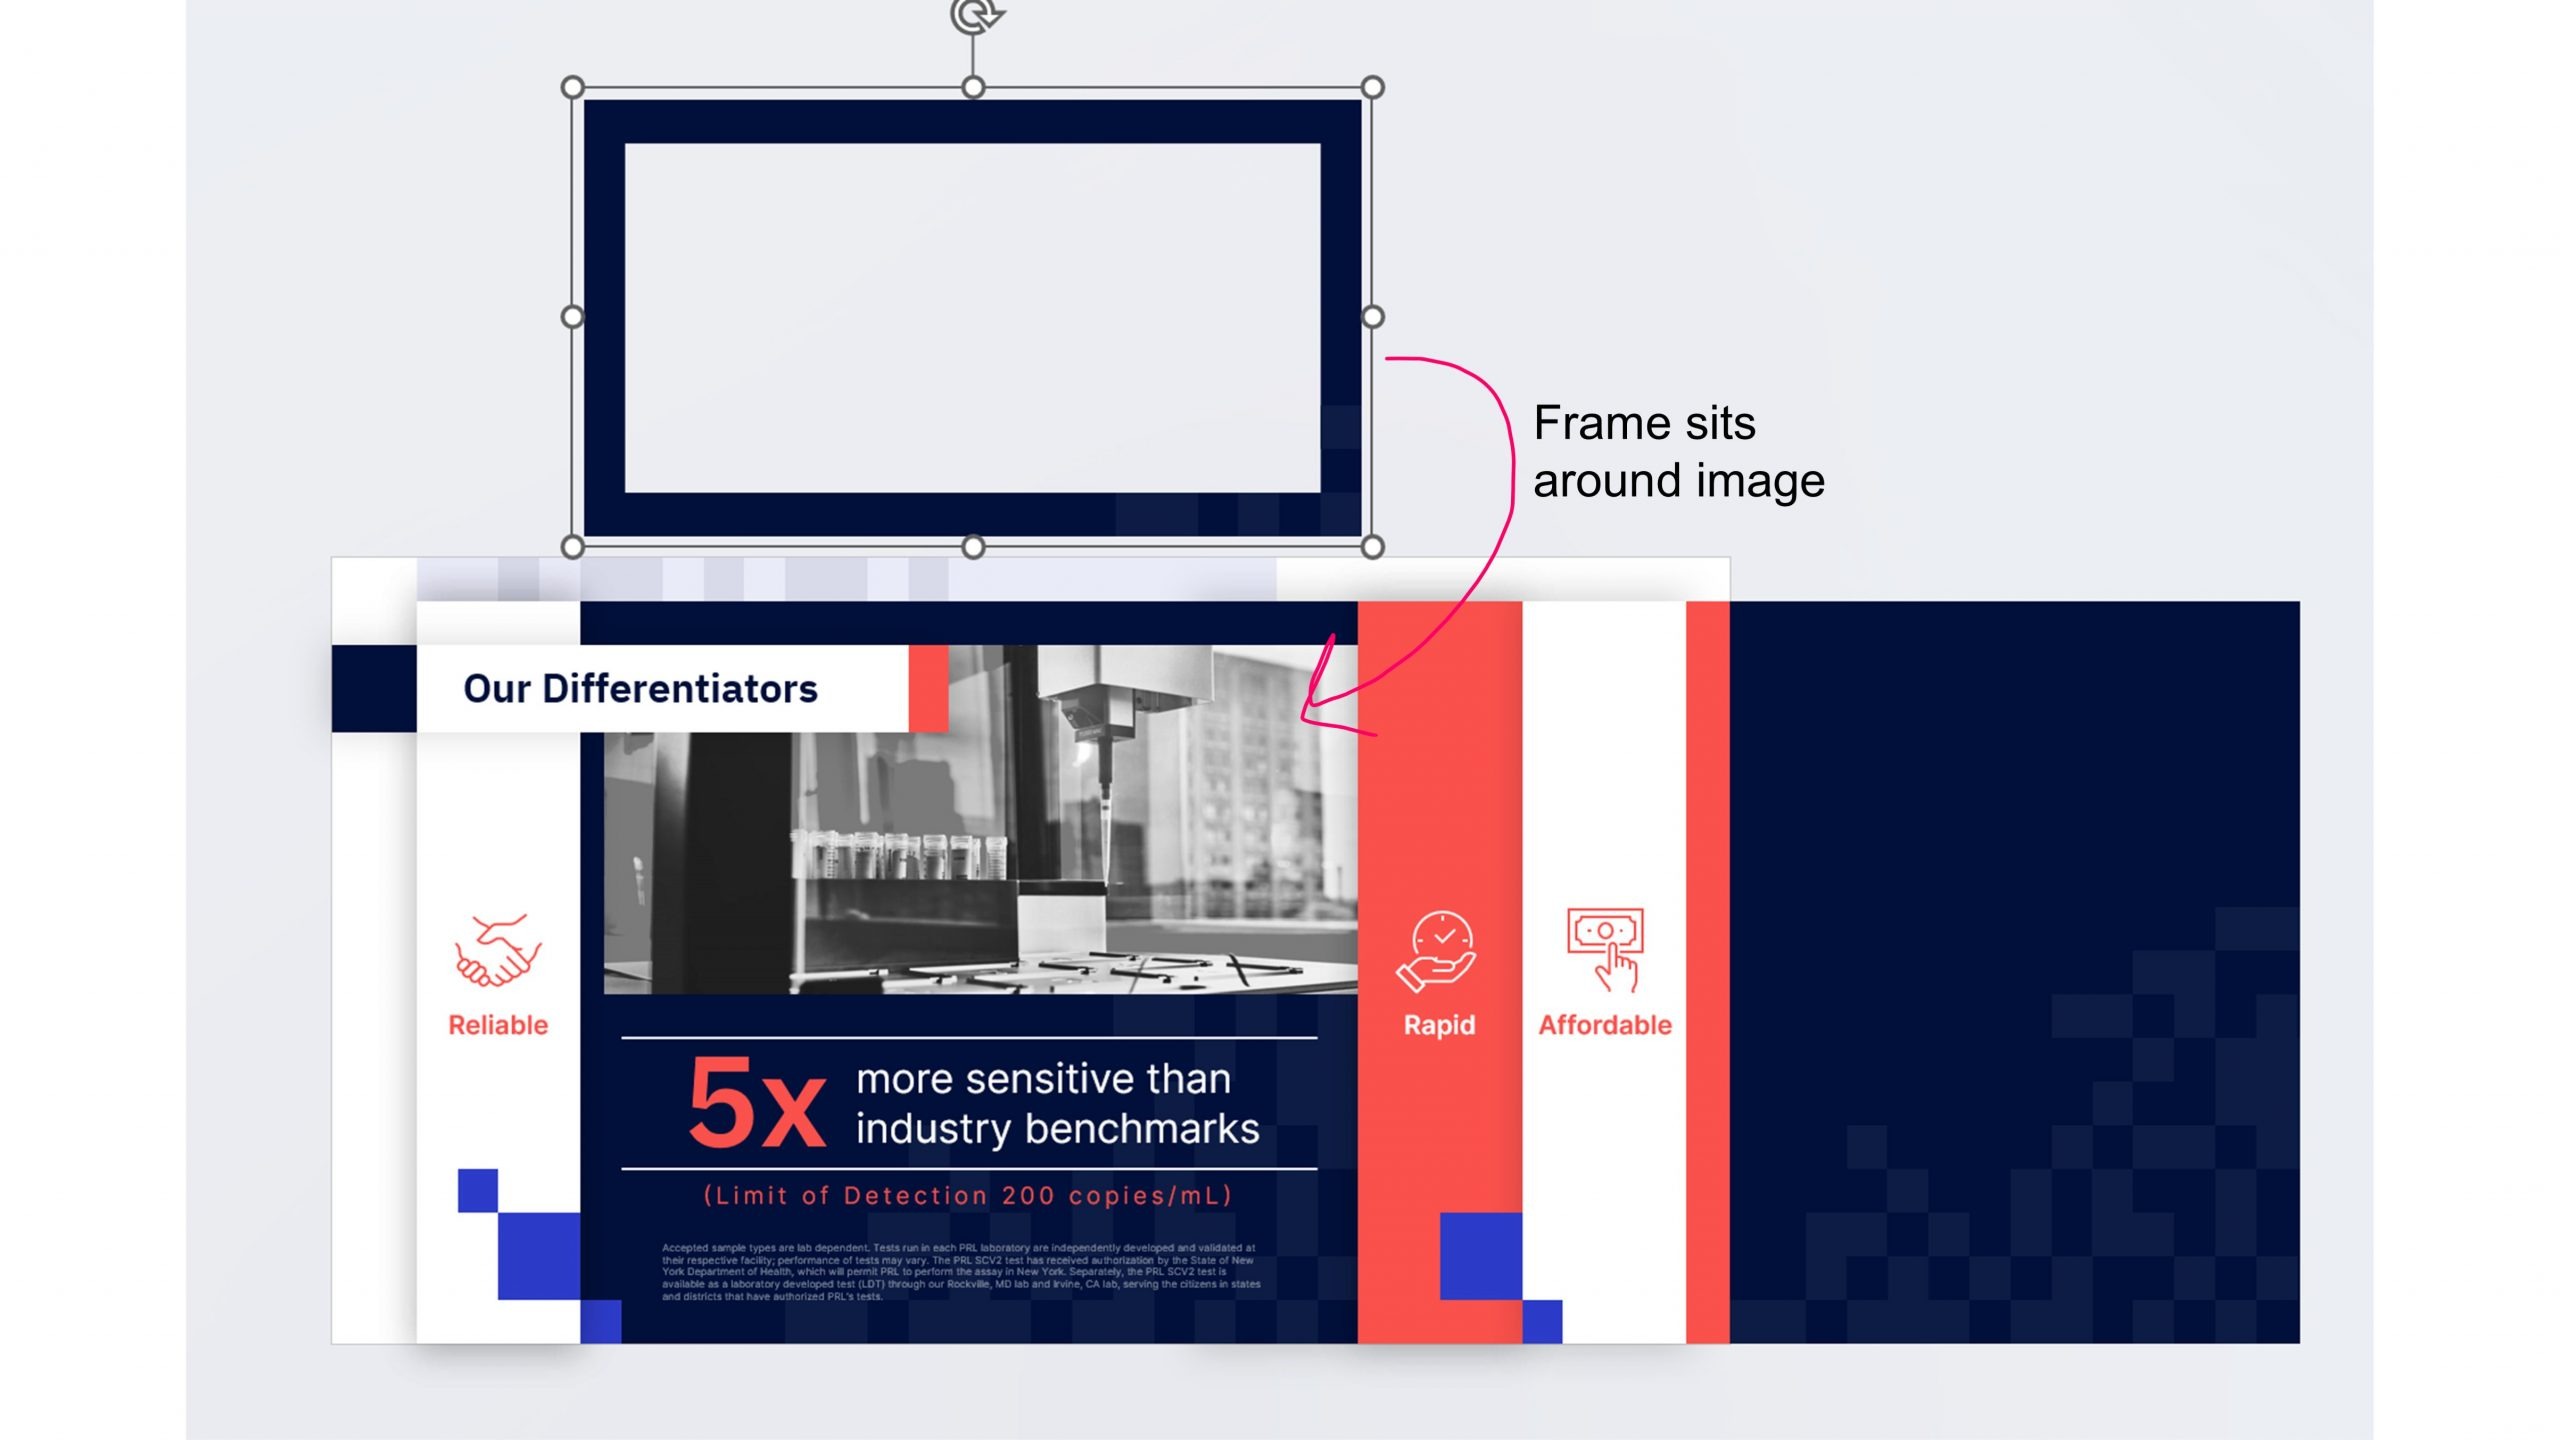
You want it to look like you’re slowly zooming in on the picture so add a frame around the picture that matches the background to maintain the same size image.
Animated Screensaver
If you don’t have time to create an all singing all dancing video then a simple, looping presentation – like one of those old animated screensavers! – could be a good trade show booth idea for you. You can still use beautiful design and subtle animation to draw the eye and add movement to your trade show booth.
As above – spend a bit of time working out what you want to show and say before diving into creating this. It could be great for showcasing short testimonials, highlighting the key benefits of your offering, or advertising any fun activities or demos you’re running in your booth.
The great thing about the animated screensaver is that you can create 3 or 4 layouts and edit the text and images to reuse again and again. This example uses a swish transition (learn how to create those here) and repeating animations to keep movement going: Learn more about looping animations. When you’re happy with what you’ve got, set the presentation to loop. To do this, go to Slide Show, Set Up Slide Show, and click Loop continuously until Esc.
Trade show booth ideas and beyond…
There’s even more that you can create in PowerPoint for your next event, from social media content advertising your stand to posters, flyers, and follow up content. Oh, and we shouldn’t forget to mention actual presentations! If you’re lucky enough to be speaking at an event then this is your next stop: Mastering high impact conference presentations.
We’re calling out one of the major injustices of corporate rebrands across the globe – PowerPoint falling to the bottom of the rebranding checklist. We discuss why it's a problem and how to fix it!
A PowerPoint template is the foundation on which polished and professional presentations are built. We interview BrightCarbon’s new Templates Lead, Gemma Leamy, and pick her brains on the ideal process for creating robust PowerPoint templates.
It can seem daunting to take a text-heavy slide or list of bullets and turn it into something visual, especially if you don’t think you’re super creative. However, the first step is simply reducing the amount of text on your slides – and you don’t have to be an artist to do that!
We have worked with BrightCarbon for over 5 years, across a number of healthcare divisions, where they have been a very important part of our bid programme, supporting numerous awards of new contracts.